INTERNATIONAL SHIPPING
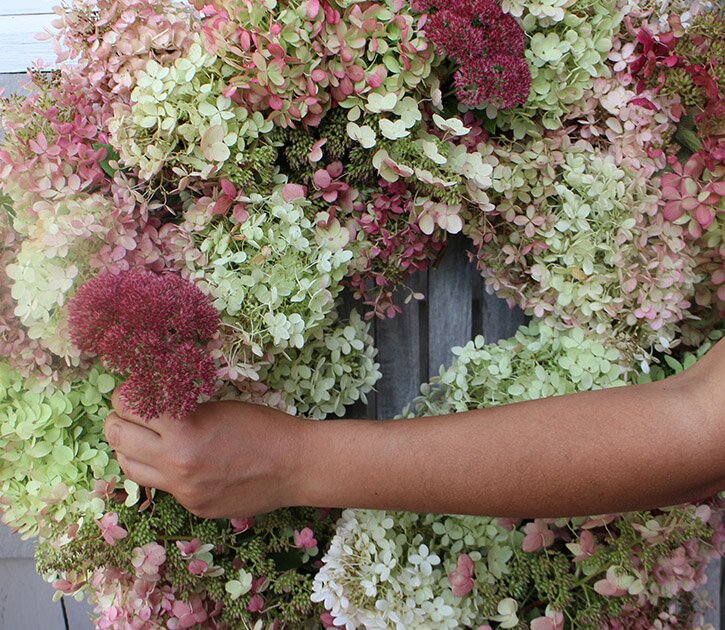

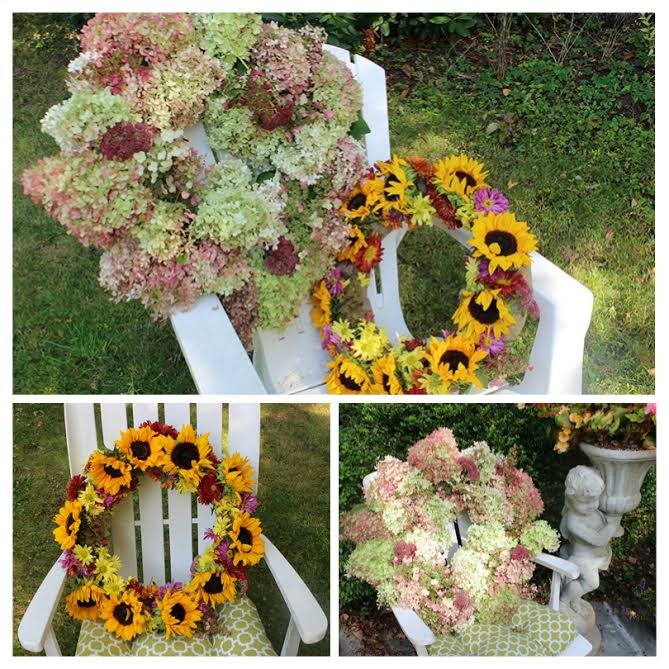
DIY Floral Wreath
4 Steps to A Festive Fall Floral Wreath
Fall is the perfect season to give fresh updates to the house. Where better to start than with your front door? With the change in season, spruce up your front door with a gorgeous fall wreath!
Supplies
- Straw or foam wreath
- Fresh flowers
- Greening pins
- Burlap
- Pruning Shears and Scissors
- Picture wire or ribbon
- Optional: Accents (ex: festive bows, ribbons, mini pumpkins/gourds or ornamental corn)
Step One: Acquire flowers
If you have flowers at home, capitalize on them by using them in your fall wreath! Mums, hydrangeas, and even sunflowers can make beautiful additions to any wreath. If you are feeling festive, try adding a couple mini pumpkins or ornamental corn to your wreath. In my garden we have a huge hydrangea bush and mums so I chose to use those. I also purchased a bouquet of sunflowers from a local grocery store to make two festive wreaths. One was made up of primarily hydrangeas; this wreath will dry over time but the flowers will not shrivel up or fall off. The other was a combination of sunflowers and mums, this wreath is more temporary and great for a housewarming gift or as a temporary decoration for your home. To make your sunflowers and mums last longer, use a spray bottle to spray them with water daily. This will help prevent the flowers from wilting or falling off.
 Step Two: Prune Flowers and Prep the Wreath
Once you have chosen your flowers it is time to trim the stems. I left about 5 inches on every stem while I was figuring out placement and then cut any stems that stuck out later. Remove any excess leaves from your flower stems and trim all the flowers to relatively equal length.
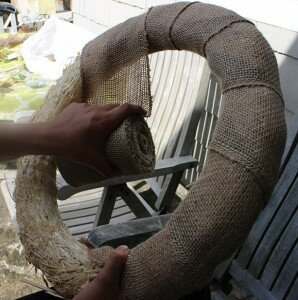
Now prep your wreath. If you purchased a straw wreath, like the one in the picture, you will not have to do much prep to the wreath form before you begin. If you purchased a floral foam wreath form, you will want to saturate the form with water before sticking the stems into the foam. A floral foam wreath is great for flowers that do not dry well and can help your floral wreath last longer. If you plan on having any exposed areas of the form we suggest wrapping your form in burlap before you begin. This will make the form look more stylish and as flowers die off you don’t have to be worried about the foam being exposed.
Step Three: Attach the Flowers
I chose to lay out my flowers before pinning them into place just to make sure that they were evenly placed around the wreath. You want to fill in as much surface area as you can so the form is not exposed at all.
Start with your largest flowers first and place those evenly around the wreath form. For the hydrangea wreath, I had four large hydrangea flowers, so I placed a large flower on the top, bottom, left, and right sides. For the sunflower wreath, I had ten large sunflowers to work with so I tried to space them out evenly. Once I established those focal points, I started to pin the large flowers into place. Once the large flowers are secure start adding the smaller flowers to fill the rest of the form. Try to vary the colors between sections, spreading the different colored flowers apart. Be sure to securely pin each flower in place.
If you are running low on flowers, try adding a festive burlap bow to the bottom or top of your wreath. This will take up space, and create a unique focal point.
 Step Four: Add Accents and Display
Once a majority of the wreath is full you can start adding accents to the wreath. In the hydrangea wreath I used sedum to fill an bare looking spaces. Sedum is a hardy fall flower that comes in pink or sometime purple tones. These accents will add a punch of color to your wreath and help your wreath to look more full. If you want something a little more festive, try tying ornamental corn to the bottom of your wreath or attaching miniature pumpkins to the wreath for a beautiful fall look!
Now you’re ready to display your new fall wreath on your door or anywhere in your home! Hang it using a nail and/or picture wire. You can also attach a strip of burlap or festive ribbon to the back and hang it on your door for an extra pop of color!